
Create & upload a product
Illustrated walkthrough: 4-step Add Product + AI Title & Description, translations, media, pricing, variants, then SEO & WhatsApp.
From Content → Products tap Add Product. A 4-step wizard opens: Details → Media → Pricing → More. Fill a solid minimum before expanding into variants and SEO.
Step 1 — Details
Enter the product name and description. The name appears in lists and on the product page; the description covers features, materials, sizing, and care. Open AI Title & Description when you want a draft, then edit promises by hand.
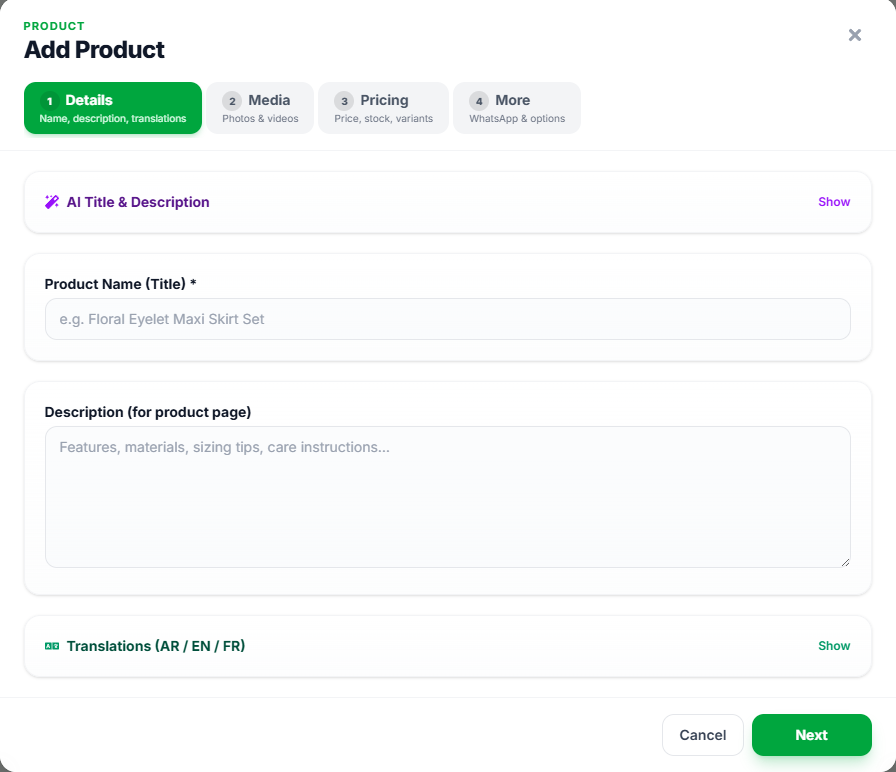
- Product Name: clear and honest — avoid overpromising titles
- Description: write what a buyer needs before purchasing
- AI Title & Description: optional — review before saving
- Tap Next to continue to Media
AI Title & Description
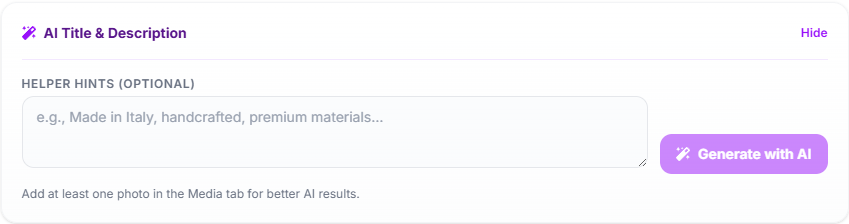
Tap Show next to AI Title & Description. Add optional helper hints (materials, origin, style…), preferably after uploading at least one photo in the Media tab for better results, then tap Generate with AI and review the draft before you rely on it.
Translations AR / EN / FR
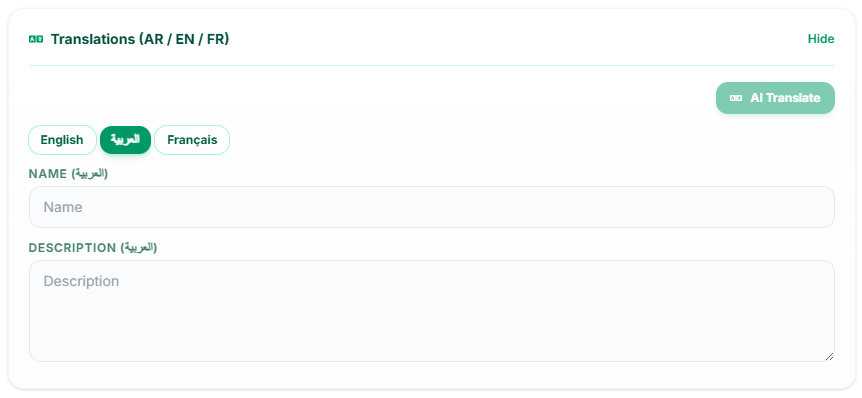
Open Translations inside Details. Switch English / العربية / Français and fill name + description per language. AI Translate speeds this up — always review brand names and sizes.
Step 2 — Media
Upload product images and optional short videos if your plan allows. If you have no categories yet, you will see a prompt to create them under Categories. One strong photo sells better than a long description.
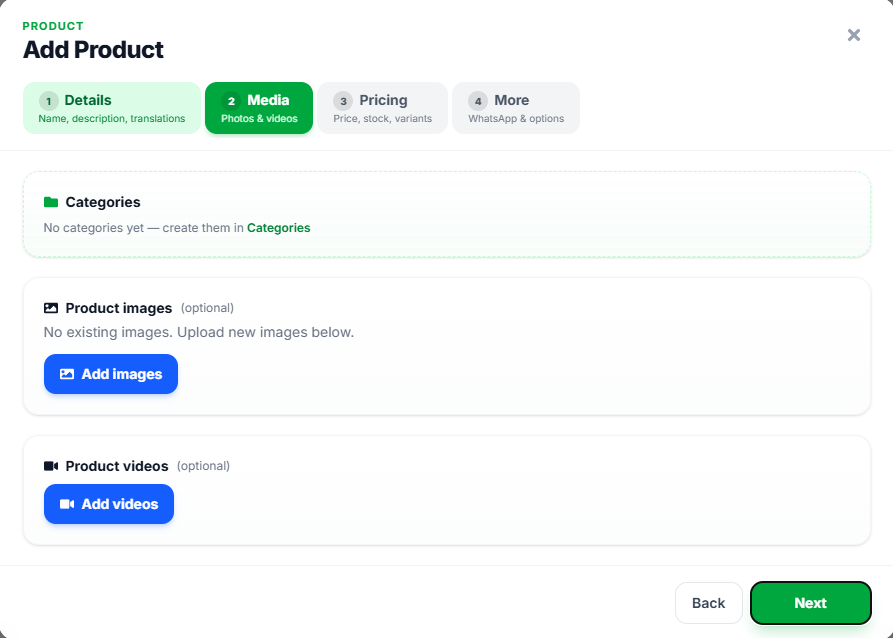
- Categories: create Highlights first if you see “No categories yet”
- Product images: upload multiple angles and set a primary
- Product videos: optional for fabric/use demos
- One excellent photo beats five blurry ones
Step 3 — Pricing & inventory
Set the base price in USD or LBP, an optional old/compare-at price for a visual discount, then stock quantity and SKU/barcode if you use POS or label printing.
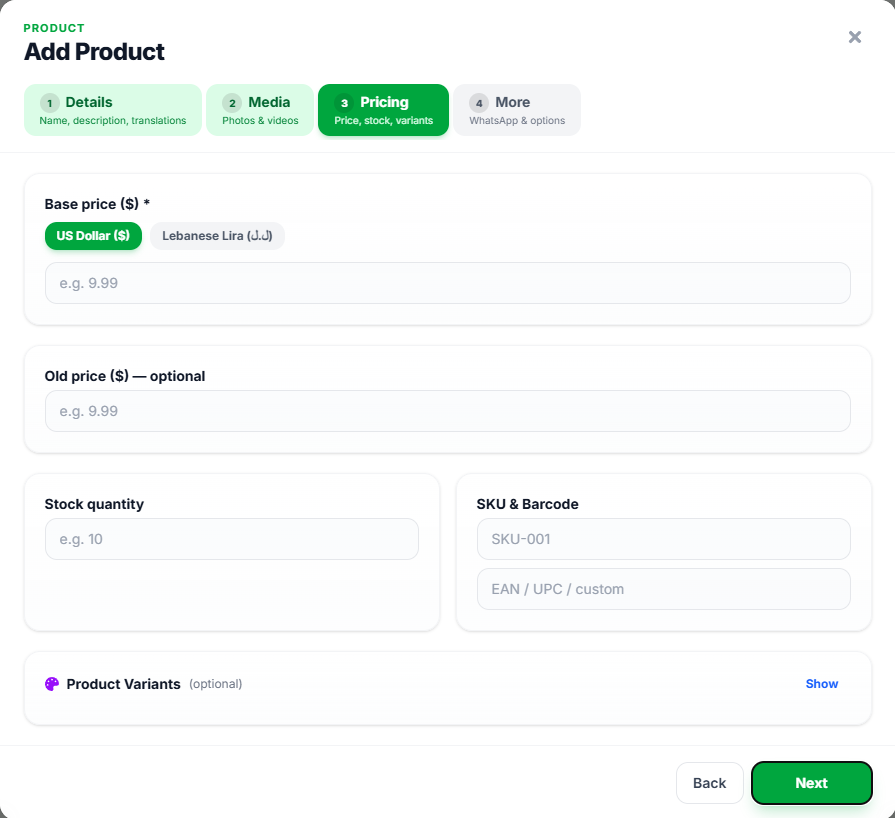
- Base price
- Required — pick USD or LBP and stay consistent across the catalog
- Old price
- Optional — shown as a strikethrough discount
- Stock quantity
- Numeric quantity; watch sellouts
- SKU / Barcode
- Important for POS, scanning, and label printers
Variants (size, color…)
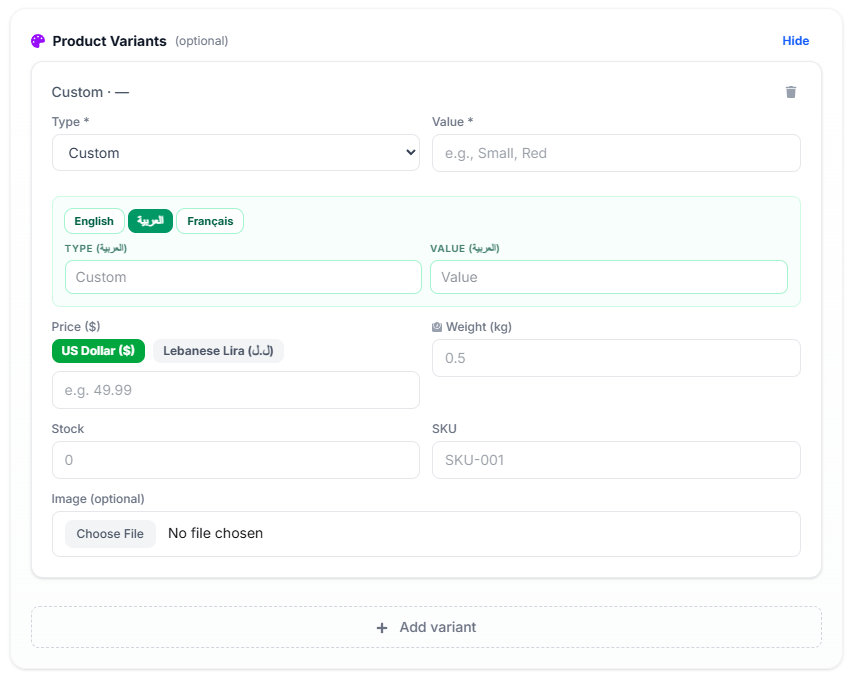
From Pricing, open Product Variants when you need sizes or colors. Per variant: type & value, translations, price, weight, stock, SKU, and optional image. Use + Add variant for more options.
Step 4 — More (SEO & WhatsApp)
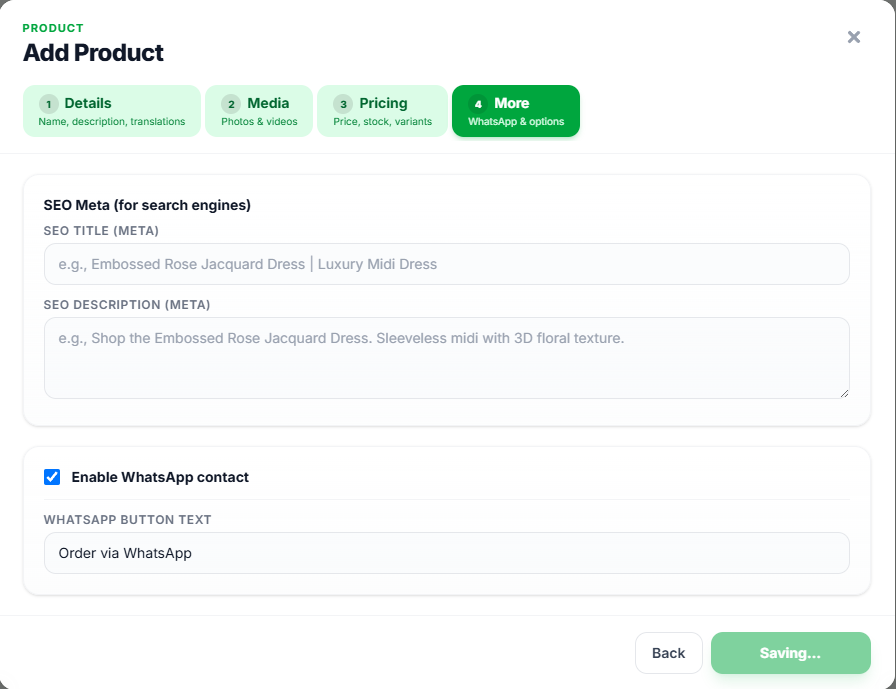
Last step: SEO title and description for search engines, plus Enable WhatsApp contact with button text (e.g. Order via WhatsApp). Then save and wait until Saving… finishes.
- Open Content → Products → Add Product
- Details: name and description (+ AI and translations if needed)
- Media: upload photos and link a category
- Pricing: price and stock (+ variants if needed)
- More: SEO and WhatsApp → save
- Open the storefront and confirm the product shows with the right photo and price